Cyberware
Kiroshi "The Oracle" Optics
Kiroshi "The Oracle" Optics is a piece of cyberware in Cyberpunk 2077. Available from vendors.
Kiroshi optical cyberware is a widely popular suite composed of electro-neural enhancements with environment-scanning functionality.
Attribute bonus
+0.5 Health per Attribute Point.
Effect per tier
| Tier | Effect |
|---|---|
| Tier 1 Capacity 10 | Effects active when scanning: Highlights enemies within 7.5 m., including enemies behind cover. Highlights cameras and turrets within 15 m. Highlights explosive devices and traps near your crosshair and within 10 m. These effects remain active for 60 sec. after scanning. 4x optical zoom when scanning. |
| Tier 1+ Capacity 10 | Effects active when scanning: Highlights enemies within 8.5 m., including enemies behind cover. Highlights cameras and turrets within 17 m. Highlights explosive devices and traps near your crosshair and within 11.5 m. These effects remain active for 60 sec. after scanning. 4x optical zoom when scanning. |
| Tier 2 Capacity 10 | Effects active when scanning: Highlights enemies within 10 m., including enemies behind cover. Highlights cameras and turrets within 20 m. Highlights explosive devices and traps near your crosshair and within 14 m. These effects remain active for 60 sec. after scanning. 6x optical zoom when scanning or aiming. |
| Tier 2+ Capacity 10 | Effects active when scanning: Highlights enemies within 11 m., including enemies behind cover. Highlights cameras and turrets within 22 m. Highlights explosive devices and traps near your crosshair and within 15.5 m. These effects remain active for 60 sec. after scanning. 6x optical zoom when scanning or aiming. |
| Tier 3 Capacity 10 | Effects active when scanning: Highlights enemies within 12.5 m., including enemies behind cover. Highlights cameras and turrets within 25 m. Highlights explosive devices and traps near your crosshair and within 18 m. These effects remain active for 60 sec. after scanning. 6x optical zoom when scanning or aiming. +0.5 Health per Attribute Point. |
| Tier 3+ Capacity 10 | Effects active when scanning: Highlights enemies within 13.5 m., including enemies behind cover. Highlights cameras and turrets within 27 m. Highlights explosive devices and traps near your crosshair and within 19.5 m. These effects remain active for 60 sec. after scanning. 6x optical zoom when scanning or aiming. +0.5 Health per Attribute Point. |
| Tier 4 Capacity 10 | Effects active when scanning: Highlights enemies within 15 m., including enemies behind cover. Highlights cameras and turrets within 30 m. Highlights explosive devices and traps near your crosshair and within 22 m. These effects remain active for 60 sec. after scanning. 8x optical zoom when scanning or aiming. +0.5 Health per Attribute Point. |
| Tier 4+ Capacity 10 | Effects active when scanning: Highlights enemies within 16 m., including enemies behind cover. Highlights cameras and turrets within 32 m. Highlights explosive devices and traps near your crosshair and within 23.5 m. These effects remain active for 60 sec. after scanning. 8x optical zoom when scanning or aiming. +0.5 Health per Attribute Point. |
| Tier 5 Capacity 10 | Effects active when scanning: Highlights enemies within 17.5 m., including enemies behind cover. Highlights cameras and turrets within 35 m. Highlights explosive devices and traps near your crosshair and within 26 m. These effects remain active for 60 sec. after scanning. 10x optical zoom when scanning or aiming. +0.5 Health per Attribute Point. |
| Tier 5+ Capacity 10 | Effects active when scanning: Highlights enemies within 18.5 m., including enemies behind cover. Highlights cameras and turrets within 37 m. Highlights explosive devices and traps near your crosshair and within 27.5 m. These effects remain active for 60 sec. after scanning. 10x optical zoom when scanning or aiming. +0.5 Health per Attribute Point. |
| Tier 5++ Capacity 10 | Effects active when scanning: Highlights enemies within 19.5 m., including enemies behind cover. Highlights cameras and turrets within 39 m. Highlights explosive devices and traps near your crosshair and within 29 m. These effects remain active for 60 sec. after scanning. 10x optical zoom when scanning or aiming. +0.5 Health per Attribute Point. |
Buy from (38)
| Vendor | Type | Condition | |
|---|---|---|---|
| Costin (Ripperdoc) | Ripperdoc | only after a story event · Level 40–60 | |
| Sogo Watanabe (Instant Implants) | Ripperdoc | only after a story event · Level 40–60 | |
| Ripperdoc | Ripperdoc | only after a story event · Level 40–60 | no location |
| Anthony (Ripperdoc) | Ripperdoc | only after a story event · Level 40–60 | |
| Cassius Ryder (Cassius) | Ripperdoc | only after a story event · Level 40–60 | |
| Fingers (Fingers M.D.) | Ripperdoc | only after a story event · Level 40–60 | no location |
| Nina Kraviz (Kraviz's Clinic) | Ripperdoc | only after a story event · Level 40–60 | |
| Octavio Delgado (Octavio's Clinic) | Ripperdoc | only after a story event · Level 40–60 | |
| Charles (Bucks' Clinic) | Ripperdoc | only after a story event · Level 40–60 | |
| Farida (Ripperdoc) | Ripperdoc | only after a story event · Level 40–60 | |
| Santiago Molina (Ripperdoc) | Ripperdoc | only after a story event · Level 40–60 | |
| Rafael Pérez (Ripperdoc) | Ripperdoc | only after a story event · Level 40–60 | |
| Viktor (Viktor's Clinic) | Ripperdoc | only after a story event · Level 40–60 | |
| Darius Clarke (Ripperdoc) | Ripperdoc | only after a story event · Level 40–60 | |
| Hutch Spindler (Ripperdoc) | Ripperdoc | only after a story event · Level 40–60 | |
| Rony Lafleur (Ripperdoc) | Ripperdoc | only after a story event · Level 40–60 | |
| Robert (Dr. Chrome) | Ripperdoc | only after a story event · Level 40–60 | |
| Eron (Ripperdoc) | Ripperdoc | only after a story event · Level 40–60 | |
| Chiyo Omoto (Ripperdoc) | Ripperdoc | only after a story event · Level 40–60 | |
| Costin (Ripperdoc) | Ripperdoc | only after a story event · Level 30–39 | |
| Sogo Watanabe (Instant Implants) | Ripperdoc | only after a story event · Level 30–39 | |
| Ripperdoc | Ripperdoc | only after a story event · Level 30–39 | no location |
| Anthony (Ripperdoc) | Ripperdoc | only after a story event · Level 30–39 | |
| Cassius Ryder (Cassius) | Ripperdoc | only after a story event · Level 30–39 | |
| Fingers (Fingers M.D.) | Ripperdoc | only after a story event · Level 30–39 | no location |
| Nina Kraviz (Kraviz's Clinic) | Ripperdoc | only after a story event · Level 30–39 | |
| Octavio Delgado (Octavio's Clinic) | Ripperdoc | only after a story event · Level 30–39 | |
| Charles (Bucks' Clinic) | Ripperdoc | only after a story event · Level 30–39 | |
| Farida (Ripperdoc) | Ripperdoc | only after a story event · Level 30–39 | |
| Santiago Molina (Ripperdoc) | Ripperdoc | only after a story event · Level 30–39 | |
| Rafael Pérez (Ripperdoc) | Ripperdoc | only after a story event · Level 30–39 | |
| Viktor (Viktor's Clinic) | Ripperdoc | only after a story event · Level 30–39 | |
| Darius Clarke (Ripperdoc) | Ripperdoc | only after a story event · Level 30–39 | |
| Hutch Spindler (Ripperdoc) | Ripperdoc | only after a story event · Level 30–39 | |
| Rony Lafleur (Ripperdoc) | Ripperdoc | only after a story event · Level 30–39 | |
| Robert (Dr. Chrome) | Ripperdoc | only after a story event · Level 30–39 | |
| Eron (Ripperdoc) | Ripperdoc | only after a story event · Level 30–39 | |
| Chiyo Omoto (Ripperdoc) | Ripperdoc | only after a story event · Level 30–39 |
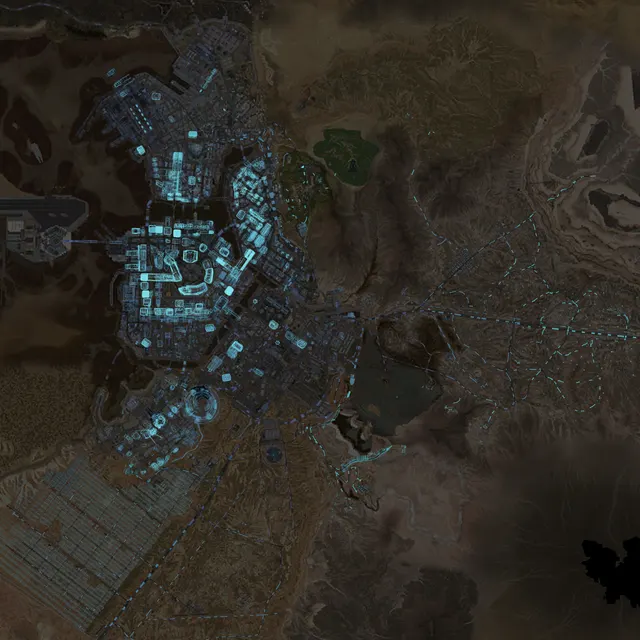
17 vendors with location
Fixed vendor stock; on top, rotating stock that the game picks to match your level.