Cyberware
Kiroshi "Doomsayer" Optics
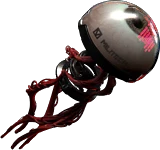
Kiroshi "Doomsayer" Optics is a piece of cyberware in Cyberpunk 2077. Available at a fixed location and from vendors.
Kiroshi optical cyberware is a widely popular suite composed of electro-neural enhancements with environment-scanning functionality.
Attribute bonus
+0.1% Crit Chance per Attribute Point.
Effect per tier
| Tier | Effect |
|---|---|
| Tier 1 Capacity 2 | Effect active when scanning: Highlights explosive devices and traps near your crosshair and within 10 m. The effect remains active for 60 sec. after scanning. 4x optical zoom when scanning. |
| Tier 1+ Capacity 2 | Effect active when scanning: Highlights explosive devices and traps near your crosshair and within 11.5 m. The effect remains active for 60 sec. after scanning. 4x optical zoom when scanning. |
| Tier 2 Capacity 2 | Effect active when scanning: Highlights explosive devices and traps near your crosshair and within 14 m. The effect remains active for 60 sec. after scanning. 6x optical zoom when scanning or aiming. |
| Tier 2+ Capacity 2 | Effect active when scanning: Highlights explosive devices and traps near your crosshair and within 15.5 m. The effect remains active for 60 sec. after scanning. 6x optical zoom when scanning or aiming. |
| Tier 3 Capacity 2 | Effect active when scanning: Highlights explosive devices and traps near your crosshair and within 18 m. The effect remains active for 60 sec. after scanning. 6x optical zoom when scanning or aiming. +0.1% Crit Chance per Attribute Point. |
| Tier 3+ Capacity 2 | Effect active when scanning: Highlights explosive devices and traps near your crosshair and within 19.5 m. The effect remains active for 60 sec. after scanning. 6x optical zoom when scanning or aiming. +0.1% Crit Chance per Attribute Point. |
| Tier 4 Capacity 2 | Effect active when scanning: Highlights explosive devices and traps near your crosshair and within 22 m. The effect remains active for 60 sec. after scanning. 8x optical zoom when scanning or aiming. +0.1% Crit Chance per Attribute Point. |
| Tier 4+ Capacity 2 | Effect active when scanning: Highlights explosive devices and traps near your crosshair and within 23.5 m. The effect remains active for 60 sec. after scanning. 8x optical zoom when scanning or aiming. +0.1% Crit Chance per Attribute Point. |
| Tier 5 Capacity 2 | Effect active when scanning: Highlights explosive devices and traps near your crosshair and within 26 m. The effect remains active for 60 sec. after scanning. 10x optical zoom when scanning or aiming. +0.1% Crit Chance per Attribute Point. |
| Tier 5+ Capacity 2 | Effect active when scanning: Highlights explosive devices and traps near your crosshair and within 27.5 m. The effect remains active for 60 sec. after scanning. 10x optical zoom when scanning or aiming. +0.1% Crit Chance per Attribute Point. |
| Tier 5++ Capacity 2 | Effect active when scanning: Highlights explosive devices and traps near your crosshair and within 29 m. The effect remains active for 60 sec. after scanning. 10x optical zoom when scanning or aiming. +0.1% Crit Chance per Attribute Point. |
Buy from (60)
| Vendor | Type | Condition | |
|---|---|---|---|
| Costin (Ripperdoc) | Ripperdoc | only after a story event · Level 40–60 | |
| Sogo Watanabe (Instant Implants) | Ripperdoc | only after a story event · Level 40–60 | |
| Ripperdoc | Ripperdoc | only after a story event · Level 40–60 | no location |
| Anthony (Ripperdoc) | Ripperdoc | only after a story event · Level 40–60 | |
| Cassius Ryder (Cassius) | Ripperdoc | only after a story event · Level 40–60 | |
| Fingers (Fingers M.D.) | Ripperdoc | only after a story event · Level 40–60 | no location |
| Nina Kraviz (Kraviz's Clinic) | Ripperdoc | only after a story event · Level 40–60 | |
| Octavio Delgado (Octavio's Clinic) | Ripperdoc | only after a story event · Level 40–60 | |
| Charles (Bucks' Clinic) | Ripperdoc | only after a story event · Level 40–60 | |
| Farida (Ripperdoc) | Ripperdoc | only after a story event · Level 40–60 | |
| Santiago Molina (Ripperdoc) | Ripperdoc | only after a story event · Level 40–60 | |
| Rafael Pérez (Ripperdoc) | Ripperdoc | only after a story event · Level 40–60 | |
| Viktor (Viktor's Clinic) | Ripperdoc | only after a story event · Level 40–60 | |
| Darius Clarke (Ripperdoc) | Ripperdoc | only after a story event · Level 40–60 | |
| Hutch Spindler (Ripperdoc) | Ripperdoc | only after a story event · Level 40–60 | |
| Rony Lafleur (Ripperdoc) | Ripperdoc | only after a story event · Level 40–60 | |
| Robert (Dr. Chrome) | Ripperdoc | only after a story event · Level 40–60 | |
| Eron (Ripperdoc) | Ripperdoc | only after a story event · Level 40–60 | |
| Chiyo Omoto (Ripperdoc) | Ripperdoc | only after a story event · Level 40–60 | |
| Costin (Ripperdoc) | Ripperdoc | only after a story event · Level 30–39 | |
| Sogo Watanabe (Instant Implants) | Ripperdoc | only after a story event · Level 30–39 | |
| Ripperdoc | Ripperdoc | only after a story event · Level 30–39 | no location |
| Anthony (Ripperdoc) | Ripperdoc | only after a story event · Level 30–39 | |
| Cassius Ryder (Cassius) | Ripperdoc | only after a story event · Level 30–39 | |
| Fingers (Fingers M.D.) | Ripperdoc | only after a story event · Level 30–39 | no location |
| Nina Kraviz (Kraviz's Clinic) | Ripperdoc | only after a story event · Level 30–39 | |
| Octavio Delgado (Octavio's Clinic) | Ripperdoc | only after a story event · Level 30–39 | |
| Charles (Bucks' Clinic) | Ripperdoc | only after a story event · Level 30–39 | |
| Farida (Ripperdoc) | Ripperdoc | only after a story event · Level 30–39 | |
| Santiago Molina (Ripperdoc) | Ripperdoc | only after a story event · Level 30–39 | |
| Rafael Pérez (Ripperdoc) | Ripperdoc | only after a story event · Level 30–39 | |
| Viktor (Viktor's Clinic) | Ripperdoc | only after a story event · Level 30–39 | |
| Darius Clarke (Ripperdoc) | Ripperdoc | only after a story event · Level 30–39 | |
| Hutch Spindler (Ripperdoc) | Ripperdoc | only after a story event · Level 30–39 | |
| Rony Lafleur (Ripperdoc) | Ripperdoc | only after a story event · Level 30–39 | |
| Robert (Dr. Chrome) | Ripperdoc | only after a story event · Level 30–39 | |
| Eron (Ripperdoc) | Ripperdoc | only after a story event · Level 30–39 | |
| Chiyo Omoto (Ripperdoc) | Ripperdoc | only after a story event · Level 30–39 | |
| Costin (Ripperdoc) | Ripperdoc | only after a story event · Level 20–29 | |
| Sogo Watanabe (Instant Implants) | Ripperdoc | only after a story event · Level 20–29 | |
| Ripperdoc | Ripperdoc | only after a story event · Level 20–29 | no location |
| Anthony (Ripperdoc) | Ripperdoc | only after a story event · Level 20–29 | |
| Cassius Ryder (Cassius) | Ripperdoc | only after a story event · Level 20–29 | |
| Fingers (Fingers M.D.) | Ripperdoc | only after a story event · Level 20–29 | no location |
| Nina Kraviz (Kraviz's Clinic) | Ripperdoc | only after a story event · Level 20–29 | |
| Octavio Delgado (Octavio's Clinic) | Ripperdoc | only after a story event · Level 20–29 | |
| Charles (Bucks' Clinic) | Ripperdoc | only after a story event · Level 20–29 | |
| Farida (Ripperdoc) | Ripperdoc | only after a story event · Level 20–29 | |
| Santiago Molina (Ripperdoc) | Ripperdoc | only after a story event · Level 20–29 | |
| Rafael Pérez (Ripperdoc) | Ripperdoc | only after a story event · Level 20–29 | |
| Viktor (Viktor's Clinic) | Ripperdoc | only after a story event · Level 20–29 | |
| Darius Clarke (Ripperdoc) | Ripperdoc | only after a story event · Level 20–29 | |
| Hutch Spindler (Ripperdoc) | Ripperdoc | only after a story event · Level 20–29 | |
| Rony Lafleur (Ripperdoc) | Ripperdoc | only after a story event · Level 20–29 | |
| Robert (Dr. Chrome) | Ripperdoc | only after a story event · Level 20–29 | |
| Eron (Ripperdoc) | Ripperdoc | only after a story event · Level 20–29 | |
| Chiyo Omoto (Ripperdoc) | Ripperdoc | only after a story event · Level 20–29 | |
| Costin (Ripperdoc) | Ripperdoc | only after a story event · Level 10–19 | |
| Sogo Watanabe (Instant Implants) | Ripperdoc | only after a story event · Level 10–19 | |
| Ripperdoc | Ripperdoc | only after a story event · Level 10–19 | no location |
17 vendors with location
Fixed vendor stock; on top, rotating stock that the game picks to match your level.
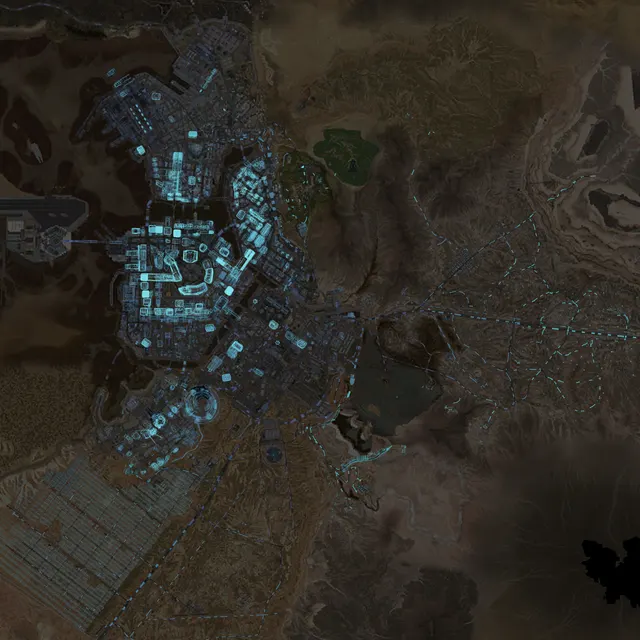
Fixed location
- Placed at 8 fixed spots in the world (see map).