







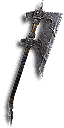


The configuration
This setup is stored as a complete build — gear, skills, runes and all four cube slots work together and are not assembled from individual statistics.
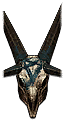
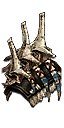
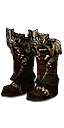
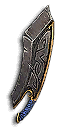
- Set: Horde of the Ninety Savages
- Rating: tier B across all classes
- Kanai's Cube: Bastion's Revered, Depth Diggers, Ring of Royal Grandeur, Convention of Elements
- Skills: Frenzy (Maniac), Furious Charge (Dreadnought), Threatening Shout (Demoralize), Battle Rage (Bloodshed), War Cry (Charge!), Wrath of the Berserker (Arreat's Wail)
- Passives: Rampage, Berserker Rage, Boon of Bul-Kathos, Ruthless
- Variants available: Speed farming, GR push, Torment 16 / Nephalem rifts
What the set does
This build wears Horde of the Ninety Savages. These bonuses apply once the matching number of set pieces is equipped — the damage multiplier hangs on them, not on the individual stats of the pieces:
- 2 pieces: Double the effectiveness of shouts. You deal double damage to Feared, Frozen, or Stunned enemies.
- 4 pieces: Each Frenzy stack reduces damage taken by 6%. Frenzy lasts twice as long.
- 6 pieces: Frenzy deals 2000% increased damage per stack.
How the variants differ
Measured against the push version. Anything not listed here stays the same:
- Speed farming: swaps in skills Furious Charge (Stamina); cube The Furnace; gems Molten Wildebeest's Gizzard.
- Torment 16 / Nephalem rifts: swaps in skills Furious Charge (Stamina), Sprint (Rush), Ignore Pain (Mob Rule); cube Goldwrap, The Furnace; gems Boon of the Hoarder.
Sockets and gems
The 3 legendary gems (Bane of the Trapped, Bane of the Stricken, Simplicity's Strength) belong in the jewellery slots — that is the only place their rank counts, and the only place they keep growing when you upgrade after a Greater Rift.
The remaining 8 sockets are filled with Diamond: the multiplier already comes from the set and the legendary powers, so one more base stat does more there than another effect would.
On the season theme
Shades of the Nephalem spawns a shadow clone of your class at every shrine and pylon that fights along for one minute. Activate shrines inside the pull, not on the way there. The fourth cube slot is already filled in every variant above.