
In Diablo 4: Lord of Hatred, raw damage alone is not enough. By the higher Torment tiers you notice it quickly: if your defence is not in order, even a good build gets torn apart by elites, ground effects or specific damage types.
This guide shows you how to understand your defence and toughness — armour, resistances and the other defensive layers — and how to improve them deliberately.
Why defence matters so much in Diablo 4
Most players look at damage first: critical strikes, attack speed, strong aspects. That is understandable, because more damage feels good immediately. The problem is this:
The golden rule: a dead character deals no damage.
To hold your own in higher Torment tiers you do not just need more DPS — above all you need a stable defensive foundation. Your defence decides whether you survive dangerous moments, keep dealing damage, and stop dying to one-shots and ground effects.
What does toughness mean?
Toughness roughly describes how much damage your character can absorb in total. Several values work together here:
- Maximum Life
- Armour
- Resistances
- Damage Reduction
- Barrier & Fortify
- Healing
- Movement and control
Important: the Toughness figure on the character screen is a decent guideline, but it does not always expose every weak spot. You can have extremely high toughness and still die if one particular resistance is very low.
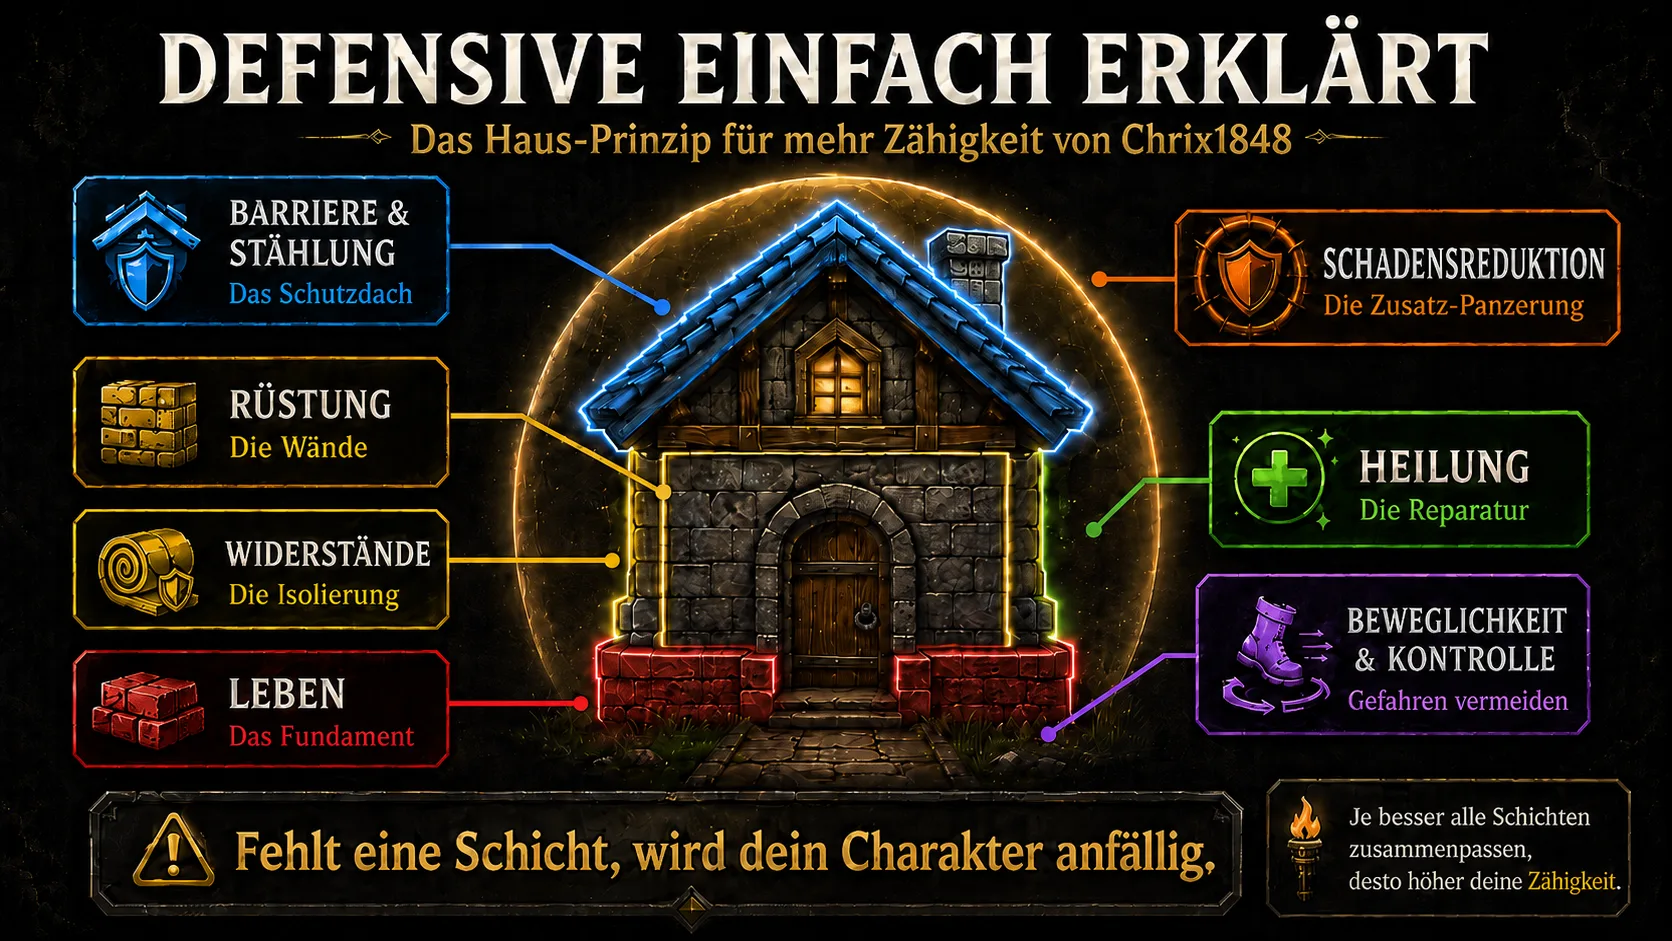
The house principle: defence explained simply
Think of your defence as building a house. Every element has its own job:
- Life is the foundation: without enough maximum Life, your defence collapses quickly.
- Armour is the walls: it reduces incoming damage and provides a stable base defence.
- Resistances are the insulation: they protect you against specific damage types — Fire, Lightning, Cold, Poison and Shadow.
- Damage Reduction is the extra plating: it helps you take even less damage in dangerous situations.
- Barrier and Fortify are shields: they buy you safety before your Life drops to a genuinely dangerous level.
- Healing repairs the house: it gets you stable again after taking damage mid-fight.
- Movement prevents the hit: not every blow has to be absorbed. Sometimes the best defence is simply dodging the dangerous attack.
The 8 pillars of survivability
1. Build more maximum Life
Maximum Life is the base of your defence. The more Life you have, the stronger many other defensive layers become — barriers scale larger, healing has more room to work.
- Sources: gear, Paragon boards, talismans, tempering & masterworking.
- Tip: if you frequently die to single large hits (one-shots), too little maximum Life is often the main cause.
2. Optimise armour
In Lord of Hatred, armour is extremely important because it above all reduces physical damage enormously.
- Sources: gear, Paragon, skills, mercenary bonuses.
- Goal: reach a solid base reduction so that ordinary hits and heavy melee attacks do not simply remove you from the fight.
3. Balance your resistances
The point is not to push one resistance especially high, but to leave no large weak spot open.
- If your Fire resistance is good but Poison or Shadow are weak, you will still die instantly in certain dungeons.
- Rule: always fix your biggest weakness first.
4. Secure damage reduction
Good sources of damage reduction are aspects, skills, Paragon and class mechanics.
- Careful: not every reduction is always active. Some effects only apply against close enemies or elites. Look for reliable sources that really are up in the dangerous moments.
5. Keep Barrier and Fortify up
These two mechanics are extremely valuable extra layers. Barrier absorbs damage before your Life, Fortify reduces the damage you take on top of that.
- What matters most here: uptime. A mechanic is worth nothing if it is rarely active.
6. Secure healing
Healing is essential for longer fights such as bosses or Pit pushes.
- Sources: Life on Hit, aspects, Life per Second, class-specific mechanics.
- Important: healing does not replace base defence. Against one-shots even the best healing will not save you.
7. Adjust your mercenary
Check whether your mercenary (Subo or Raheir, for instance) can give you defensive benefits. Many players leave this untouched, even though small bonuses to armour or resistances from a mercenary make the difference in the endgame.
8. Use mobility and control
In higher Torment tiers especially, you have to recognise dangerous situations early. Whoever dodges takes no damage. Use skills for Unstoppable against crowd control, and stuns to control the battlefield.
Defence checklist & troubleshooting
Why are you dying despite high toughness? Work through this checklist step by step to find the flaw in your build:
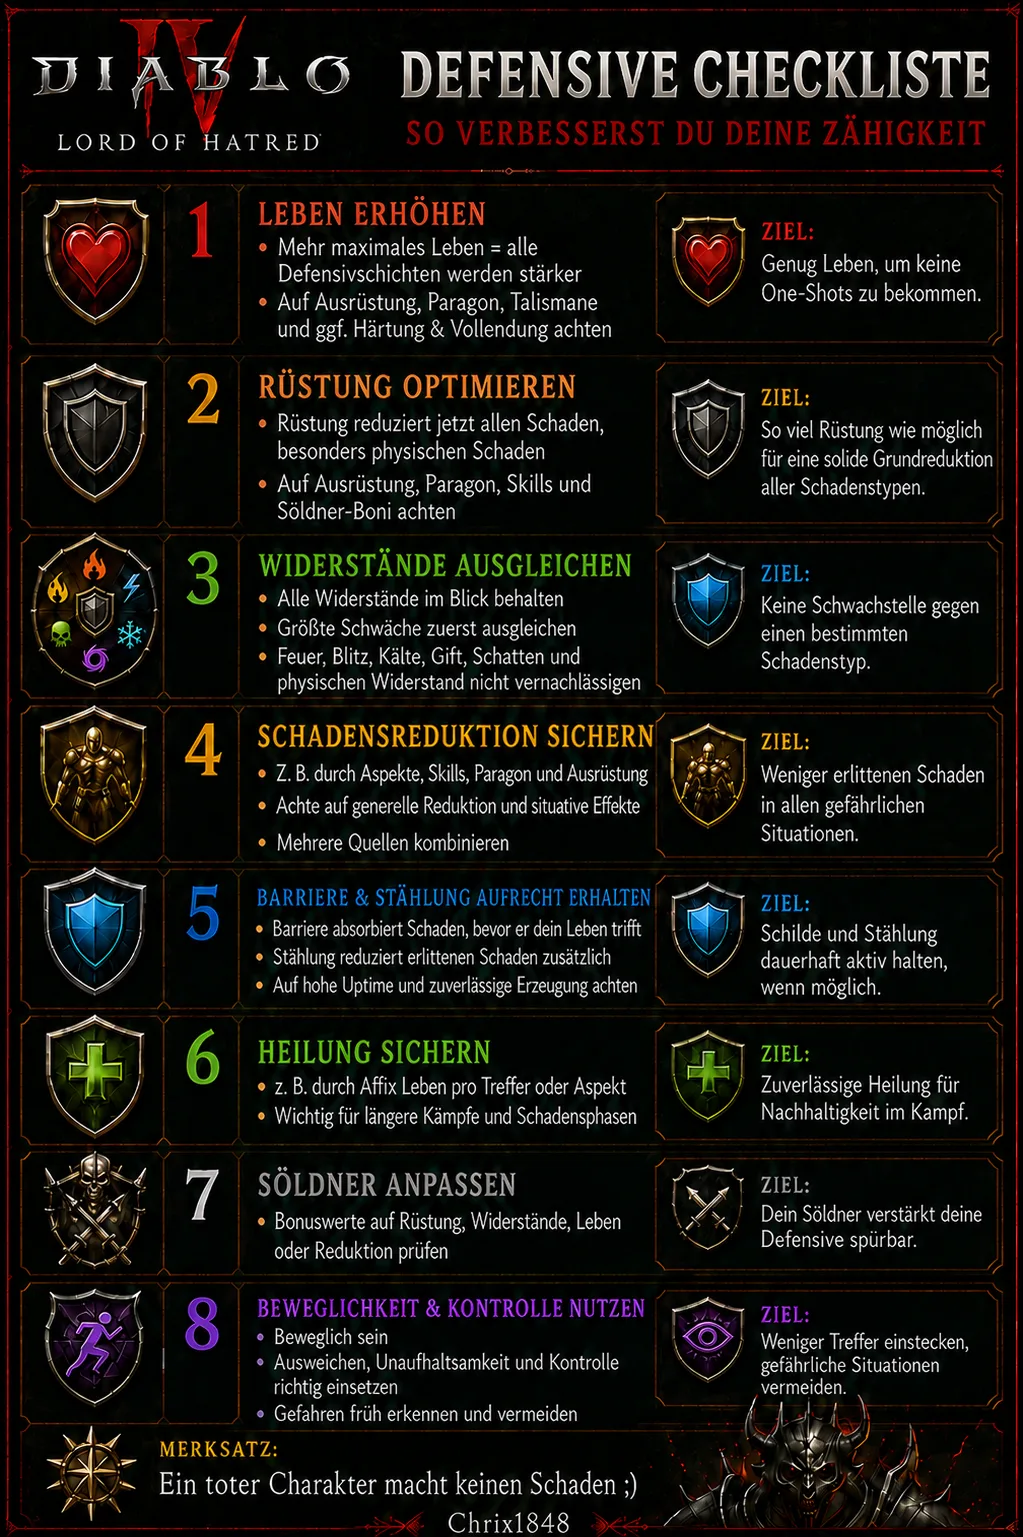
- Check maximum Life: dying to single hits? -> More Life.
- Improve armour: taking too much physical damage? -> Push armour.
- Compare resistances: which value is lowest? -> Fix that one.
- Add damage reduction: base defence not enough? -> Use defensive aspects.
- Barrier & Fortify: do your shields keep running out? -> Improve uptime.
- Add healing: running out of steam in boss fights? -> Add Life on Hit.
- Check your mercenary: missing passive bonuses? -> Adjust mercenary skills.
- Improve movement: often standing in ground effects? -> Increase mobility.
Conclusion
Defence in Diablo 4: Lord of Hatred is not a single number. It is the sensible interplay of several layers, and it has to be re-tuned every time your gear changes.
So if you want to become more stable, do not look only at your damage. Optimise your defence step by step along the house principle, and the higher Torment tiers suddenly become far more relaxed.
See you in Sanctuary! Your Chrix1848